Introduction
Welcome to your journey of creating a Grand Theft Auto V roleplay server that mirrors the immersive experience of NoPixel. NoPixel is a highly acclaimed GTA V RP server renowned for its rich storytelling, engaging gameplay, and active community. Players immerse themselves in various roles—from law enforcement officers and medical professionals to business owners and criminals—crafting dynamic narratives in a living, breathing virtual world.
Why Create Your Own NoPixel-Like Server?
Building your own server allows you to tailor the roleplay environment to your vision. Whether you aspire to recreate the adrenaline-fueled pursuits of NoPixel or cultivate a unique roleplay setting, having control over the gameplay mechanics, rules, and community fosters a personalized experience. It’s an opportunity to innovate, manage, and grow a community that aligns with your ideals.
Who Is This Guide For?
This guide is crafted for beginners with little to no experience in server creation. We aim to provide clear, step-by-step instructions to help you set up and customize a high-quality roleplay server using FiveM. We’ll focus on accessible guidance, avoiding overly technical jargon, to ensure you can confidently embark on this project.
Table of Contents
1. Basic Server Requirements and Setup
Hardware and Software Requirements
Before you begin, ensure you have the following hardware and software:
Hardware:
- Dedicated Server or High-Performance Computer:
- CPU: Quad-core processor or better.
- RAM: Minimum of 8 GB (16 GB recommended for optimal performance).
- Storage: At least 50-100 GB of free space.
- Network: Stable internet connection with sufficient upload/download speeds.
Software:
- Operating System:
- Windows 10/11 (64-bit) or a compatible Linux distribution (e.g., Ubuntu 20.04 LTS).
- Essential Tools:
- FiveM Server Files: Core files required to run your server.
- Visual Studio Code: A powerful, free code editor for script editing.
- Git: Version control system for managing your scripts and resources.
- MySQL Server: Database system to store server data.
- MySQL Workbench: GUI tool for database management.
Installing Necessary Tools
1. Install Visual Studio Code (VS Code):
- Download:
- Visit the Visual Studio Code website and download the installer for your operating system.
- Installation:
- Run the installer and follow the on-screen instructions.
- Launch VS Code after installation to ensure it’s working correctly.
2. Install Git:
- Download:
- Visit the Git website and select your operating system.
- Installation:
- Run the downloaded installer.
- During installation, you can keep the default settings unless you have specific preferences.
3. Install MySQL Server and MySQL Workbench:
- Download:
- Go to the MySQL Community Downloads page.
- Choose the MySQL Installer for your OS.
- Installation:
- Run the installer and select “Custom” installation.
- Under “MySQL Servers,” select the latest “MySQL Server” version.
- Under “Applications,” select “MySQL Workbench.”
- Proceed with the installation.
- Configuration:
- Set up a root password when prompted.
- Remember your credentials; you’ll need them later.
4. Set Up FiveM Server Files:
- Download FiveM Server Artifacts:
- Visit the FiveM Artifacts page.
- Download the latest recommended version for your operating system.
- Create Server Directory:
- Create a folder for your server (e.g.,
C:\FiveMServer).
- Create a folder for your server (e.g.,
- Extract Files:
- Extract the downloaded server artifacts into your server directory.
5. Install txAdmin (Optional but Recommended):
- Purpose:
- txAdmin is a full-featured web panel to help you manage your FiveM server.
- Setup:
- In your server directory, create a new file named
server.cfg. - Run the
FXServer.exe(Windows) orrun.sh(Linux). - Follow the on-screen instructions to set up txAdmin.
- In your server directory, create a new file named
2. Choosing the Right Framework
Selecting the appropriate framework is crucial as it determines the core functionality of your server.
Popular Frameworks for Roleplay Servers
- ESX (Extended Script):
- Pros:
- Large community support.
- Extensive library of pre-made scripts.
- Highly customizable.
- Cons:
- Can be resource-intensive.
- May include outdated code in some scripts.
- Ideal for:
- Beginners who want a feature-rich environment with ample resources.
- Pros:
- vRP (Virtual Roleplay):
- Pros:
- Modular and flexible.
- Encourages custom script development.
- Cons:
- Steeper learning curve.
- Smaller community support.
- Ideal for:
- Advanced users seeking deep customization.
- Pros:
- QBCore:
- Pros:
- Modern codebase with optimized performance.
- Active development and support.
- Lightweight and efficient.
- Cons:
- Smaller script library compared to ESX.
- Ideal for:
- Beginners who prefer a streamlined, efficient setup.
- Pros:
Framework Comparison Table
| Feature | ESX | vRP | QBCore |
|---|---|---|---|
| Ease of Use | Easy | Moderate | Easy |
| Community Support | Large, Active | Moderate | Growing, Active |
| Performance | Moderate | High | High |
| Customization | High | Very High | High |
| Script Availability | Extensive | Limited | Moderate, Growing |
| Learning Curve | Low | High | Low |
Recommendation for Beginners
For those new to server creation, QBCore is an excellent starting point due to its simplicity and modern approach. However, if you prefer having a vast array of pre-made scripts and a larger community, ESX might be the way to go.
3. Database Setup
Setting up a database is essential for storing player data, inventories, and other critical information.
Installing and Configuring MySQL Database
1. Open MySQL Workbench:
- Launch MySQL Workbench from your applications menu.
2. Create a New Connection:
- Click on the “+” icon next to “MySQL Connections.”
- Enter a connection name (e.g., “FiveMServer”).
- Use “localhost” as the hostname.
- Enter your MySQL username (usually “root”) and password.
3. Create a New Database:
- After connecting, go to the “Schemas” tab.
- Right-click in the schemas area and select “Create Schema.”
- Name your database (e.g., “fivem_rp”) and click “Apply.”
4. Create a New User (Optional but Recommended):
- Navigate to “Server” > “Users and Privileges.”
- Click “Add Account.”
- Enter a username (e.g., “fivem_user”) and a secure password.
- Under “Schema Privileges,” grant the user all privileges for the “fivem_rp” database.
Configuring Database Connection in Server Files
1. Edit server.cfg File:
- Open the
server.cfgfile in your server directory using Visual Studio Code.
2. Add the Database Connection String:
- For ESX:
set mysql_connection_string "server=localhost;uid=fivem_user;password=yourpassword;database=fivem_rp" - For QBCore:
set mysql_connection_string "mysql://fivem_user:yourpassword@localhost/fivem_rp?charset=utf8mb4"
3. Ensure Database Resources Are Started:
- Add the following lines to your
server.cfgto start the essential database resources:ensure mysql-async ensure ghmattimysql
Note: The specific resource names depend on the framework and scripts you are using.
4. Finding and Selecting Scripts/Mods
Scripts and mods are the backbone of your server’s functionality, enabling various features and enhancing gameplay.
Where to Find Scripts/Mods
- Official Forums:
- Community Websites:
- GitHub repositories (search for FiveM scripts)
- Dedicated FiveM script marketplaces (ensure they are reputable)
-
Product on sale
 LD HUD 4.0Original price was: $35.00.$20.00Current price is: $20.00.
 -
Product on sale
 0R NPC DialogOriginal price was: $38.00.$28.00Current price is: $28.00.
 -
Product on sale
Debux Love MenuOriginal price was: $50.00.$40.00Current price is: $40.00.
-
Product on sale
NoPixel Market – 24/7 SupermarketOriginal price was: $55.00.$35.00Current price is: $35.00.
-
Product on sale
0r Advanced Clothing v3Original price was: $49.00.$29.00Current price is: $29.00.
-
Product on sale
Eyes WeaponStore V2Original price was: $39.00.$20.00Current price is: $20.00.
-
Product on sale
Lab Pet V3Original price was: $90.00.$60.00Current price is: $60.00.
-
Product on sale
MT Workshops 2.0Original price was: $49.00.$35.00Current price is: $35.00.
-
Product on sale
Realistic AirdropOriginal price was: $35.00.$22.00Current price is: $22.00.


Popular Script Categories
- Jobs:
- Police, EMS, Mechanic, Taxi, etc.
- Enable players to take on various roles within the game.
- Inventory Systems:
- Manage player items, weapons, and resources.
- Examples: “ESX Inventory HUD,” “QBCore Inventory.”
- Vehicle Systems:
- Custom vehicles, garages, and handling.
- Vehicle shops and ownership.
- Housing Systems:
- Purchase, furnish, and manage properties.
- Adds depth to the roleplay experience.
- Banking Systems:
- Realistic financial transactions.
- ATMs, banks, and financial institutions.
Tips for Selecting Scripts/Mods
- Compatibility:
- Ensure the script is compatible with your chosen framework.
- Support and Updates:
- Prefer scripts that are actively maintained.
- Reputation:
- Check reviews and community feedback.
- Resource Usage:
- Opt for optimized scripts to maintain server performance.
- Avoid Pirated Content:
- Use legitimate sources to avoid legal issues and support developers.
5. Customizing Your Server
Customization sets your server apart and enhances the overall player experience.
Adding Essential Scripts
1. Installing Scripts:
- Download the Script:
- Obtain the script from a trusted source.
- Place in Resources Folder:
- Move the script folder to your server’s
resourcesdirectory.
- Move the script folder to your server’s
- Add to server.cfg:
- Open
server.cfgand addensure scriptnameto start the script.
- Open
2. Essential Scripts to Consider:
- Core Roleplay Scripts:
- es_extended (for ESX)
- qb-core (for QBCore)
- Jobs:
- esx_policejob, qb-policejob
- Interaction Menus:
- esx_menu_default, qb-menu
- Chat and Commands:
- chat, command suggestions
Simple Customizations
1. Changing the Server Name and Logo:
- Server Name:
- In
server.cfg, findsv_hostnameand set it to your desired server name.
- In
- Server Logo:
- Place your logo image (preferably
banner.png) in theresources\[your resource folder]. - Reference it in your
server.cfgif necessary.
- Place your logo image (preferably
2. Adding Custom Maps (MLOs):
- Download MLO:
- Obtain the MLO from a reputable source.
- Install MLO:
- Place the MLO files into a new folder within
resources.
- Place the MLO files into a new folder within
- Start the MLO:
- Add
ensure mlo_folder_nametoserver.cfg.
- Add
3. Custom Vehicles:
- Download Vehicle Models:
- Ensure they are optimized for FiveM.
- Install Vehicles:
- Place them in a
[cars]folder insideresources.
- Place them in a
- Configure Vehicle Meta Files:
- Set up handling and vehicle data as required.
- Start Vehicles:
- Add
ensure car_folder_nametoserver.cfg.
- Add
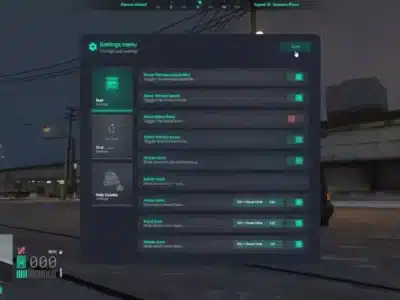
6. Adding a NoPixel-Style HUD (UI)
A clean and functional HUD (Heads-Up Display) enhances immersion and user experience.
Implementing a Custom HUD
1. Choose a HUD Script:
- Popular Options:
- ESX_HUD for ESX.
- qb-hud for QBCore.
- Custom HUDs inspired by NoPixel (ensure they are legitimately sourced).
2. Install the HUD Script:
- Download and Place:
- Move the HUD script folder into
resources.
- Move the HUD script folder into
- Start the Script:
- Add
ensure hud_script_nametoserver.cfg.
- Add
3. Customize the HUD:
- Configuration Files:
- Open the HUD’s configuration files in Visual Studio Code.
- Adjust Settings:
- Modify colors, positions, and displayed elements (e.g., health, armor, hunger, thirst).
- Testing:
- Restart the server and check the HUD in-game.
- Fine-Tuning:
- Make adjustments based on in-game observations.
Enhancing User Interaction
1. Interaction Menus:
- Radial Menus:
- Provides quick access to actions and items.
- Examples: “dpemotes,” “qb-radialmenu.”
2. Notifications and Alerts:
- Custom Notifications:
- Install scripts for on-screen messages.
- Customize appearance and behavior.
7. Launching Your Server
After setup and customization, it’s time to launch and share your server.
Testing the Server Locally
1. Start the Server:
- Run
FXServer.exe(Windows) orrun.sh(Linux). - Ensure no errors appear in the console during startup.
2. Connect to the Server:
- Open FiveM client.
- Press F8 to open the console.
- Type
connect localhostand press Enter.
3. In-Game Testing:
- Test all functionalities:
- Job systems.
- Inventory.
- HUD elements.
- Interaction menus.
- Debugging:
- Note any errors or issues and resolve them.
Preparing for Public Launch
1. Server Visibility:
- In
server.cfg, ensuresv_master1is not commented out to make your server public.
2. Set Up a Whitelist (Optional):
- Purpose:
- Control who can join your server to maintain quality.
- Implementation:
- Install a whitelist script compatible with your framework.
- Configure permissions and add users accordingly.
3. Establish Server Rules:
- Importance:
- Maintains order and enhances roleplay quality.
- Distribution:
- Create a Discord server or website where rules are posted.
- Use in-game prompts to remind players of the rules.
4. Community Building:
- Discord Server:
- Set up a Discord for communication and support.
- Forums and Social Media:
- Promote your server on FiveM forums and relevant groups.
- Feedback Mechanisms:
- Encourage players to provide feedback for improvements.
8. Basic Support and Maintenance
Regular maintenance ensures a smooth and enjoyable experience for your players.
Regular Maintenance Tasks
1. Updating Scripts and Frameworks:
- Check for Updates:
- Regularly visit script repositories and forums.
- Backup Before Updating:
- Always backup your server files and database.
- Test Updates Locally:
- Use a test environment to ensure updates don’t cause issues.
2. Database Management:
- Backups:
- Schedule regular backups of your MySQL database.
- Optimization:
- Clean up unused data to optimize performance.
3. Performance Monitoring:
- Resource Usage:
- Monitor CPU, RAM, and network usage.
- Lag and Latency:
- Address any performance bottlenecks promptly.
4. Security Measures:
- Anti-Cheat Systems:
- Install anti-cheat scripts to prevent cheating.
- Server Protection:
- Use firewalls and secure passwords.
Useful Resources and Links
- FiveM Official Documentation: docs.fivem.net
- ESX Framework: esx-framework.org
- QBCore Framework: qbus.gitbook.io
- FiveM Forums: forum.cfx.re
- txAdmin Documentation: txadm.in
9. Conclusion
Creating a NoPixel-like server is a fulfilling project that combines creativity, technical skills, and community management. By following this comprehensive guide, you have laid the groundwork for a thriving roleplay server. Remember, the key to a successful server is continuous improvement, active engagement with your community, and a passion for the immersive world you’re building.
Final Tips:
- Start Small: Focus on core features before adding complex scripts.
- Community Engagement: Listen to player feedback and foster a welcoming environment.
- Continuous Learning: Stay updated with the latest developments in the FiveM community.
- Enjoy the Process: Building and managing a server is as rewarding as playing on it.

